Task Manager
CMDBuild allows you to configure automatic operations executed in the background through an integrated Task Manager. The Task Manager centralizes the management of these operations, providing a unified view of active tasks and their execution parameters.
The available task types are:
- Read emails — monitor an email inbox, file messages and attachments, send notifications, and start workflows
- Send email — scheduled email delivery, optionally with an attached report
- Import / Export file — scheduled file-based import or export using templates
- Import database — scheduled import from relational databases
- Import GIS — scheduled import of GIS data
- Import IFC — scheduled import of IFC files
- Start workflow — automatic workflow execution
- Service bus — automatic execution of a service bus
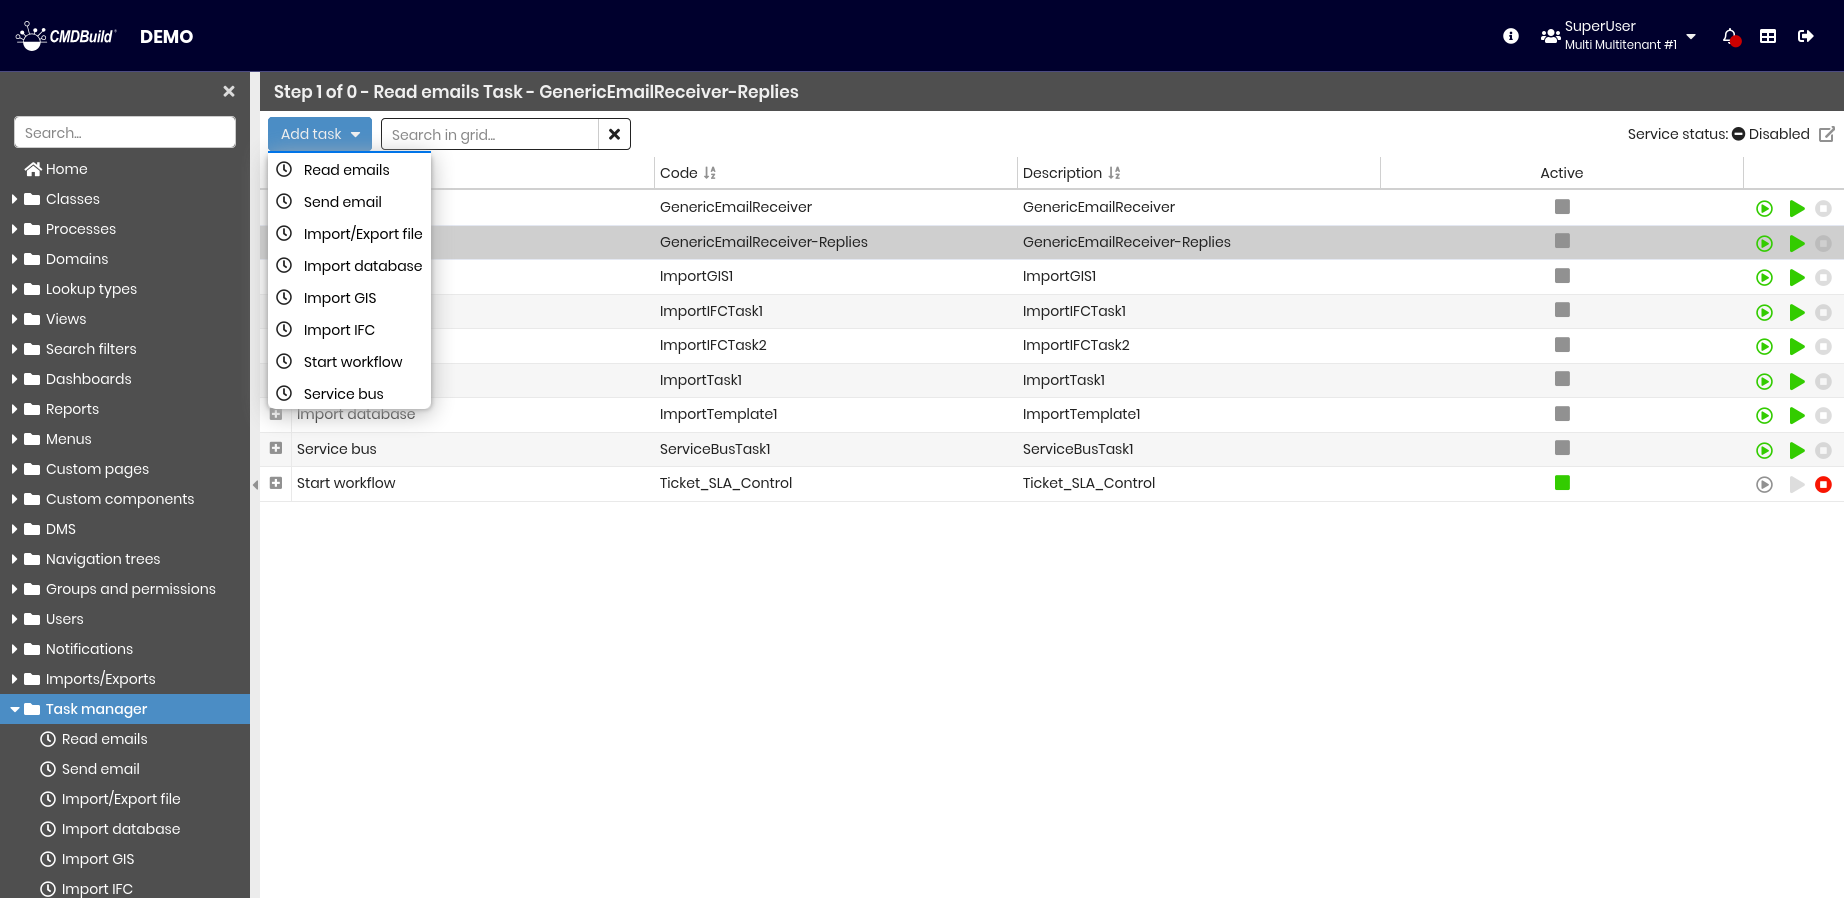
The following operations are available:
-
Top bar:
- Add a new task
- Search for a task in the list
- Open the system page using the top-right tool
-
Single row actions:
- Run a task once
- Start a task
- Stop a running task
- Expand the row to:
- Edit the selected task
- View detailed task information
- Clone the selected task
- Delete the selected task
The Task Manager configuration is stored in the database. When CMDBuild is restarted, all active tasks are automatically restarted.
Each task type is configured through a dedicated wizard, described in the following sections.
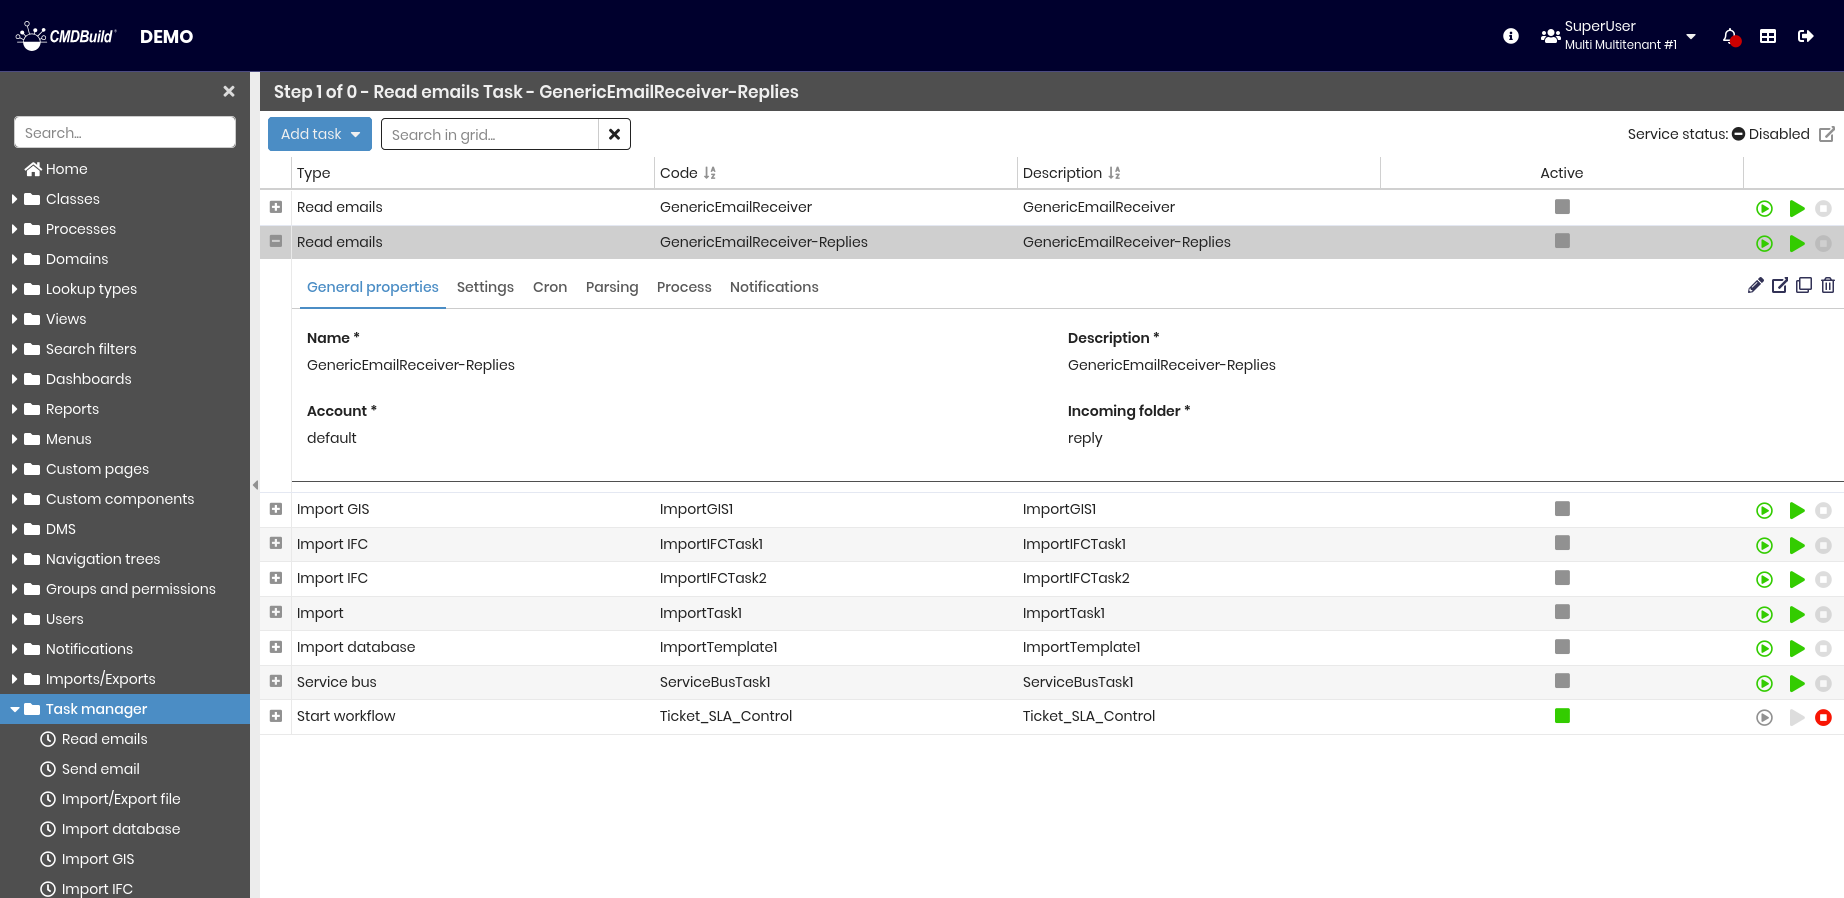
Read emails
This task monitors a folder for incoming emails, checks them against predefined filter criteria, and executes the configured actions.
Supported actions include:
- Sending notifications
- Saving attachments to DMS service
- Starting workflows
A typical use case is the automatic start of Incident Management workflows based on emails received from users, including the management of subsequent replies within the same process.
1 - General properties
The following information is required:
- Name — task name
- Description — task description
- Account — Post account used to monitor incoming emails
- Incoming folder — folder to be monitored for incoming emails

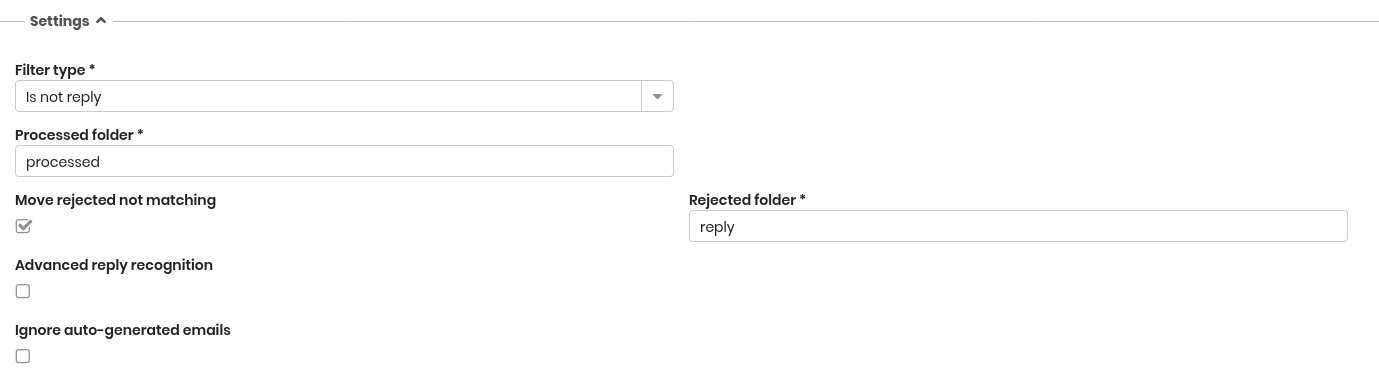
2 - Settings
The following information is required:
- Filter type, one of:
- None
- Regex — enables additional fields:
- Sender — regular expression to filter email senders
- Subject — regular expression to filter email subjects
- PostgreSQL function — enables:
- Function — database function implementing the filter
- This is a reply to an email sent from CMDBuild
- This is not a reply to an email sent from CMDBuild
- Processed folder — destination folder for processed emails
- Move rejected not matching — moves emails rejected by the filter. Enables:
- Rejected folder — destination folder for rejected emails
- Advanced reply recognition — uses header tags to link incoming and outgoing emails to related data cards
- Ignore auto-generated emails — ignores automatically generated emails and optionally notifies the sender using a predefined template specified in the Auto-generated emails receipt notification template field
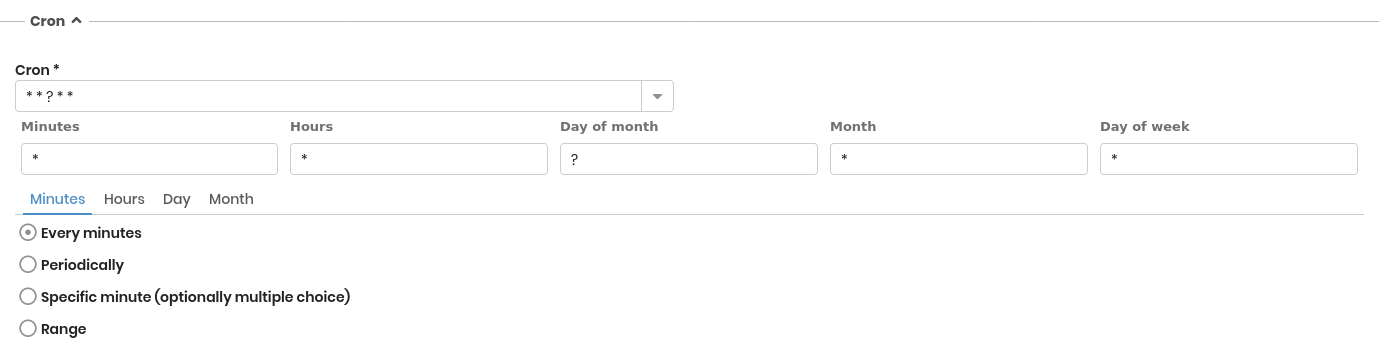
3 - Cron
The scheduling configuration is required:
- Simple mode — every hour, day, month, or year
- Advanced mode — Linux cron syntax

4 - Parsing
The following information is required:
- Body parsing — enables email body parsing
- Key start delimiter — specifies the opening delimiter used to identify a key field in the email body
- Key end delimiter — specifies the closing delimiter used to identify a key field in the email body
- Value start delimiter — specifies the opening delimiter used to identify a value field in the email body
- Value end delimiter — specifies the closing delimiter used to identify a value field in the email body
- Save attachment to DMS — saves attachments to the Document Management System
- Action on attachments — link attachments to the email card or to a data card
- Category — document category assigned to attachments
- Execute gate — executes a template or gate, enabling:
- Gate type — allows you to select import GIS, import database or others
- Gate — template or gate to execute
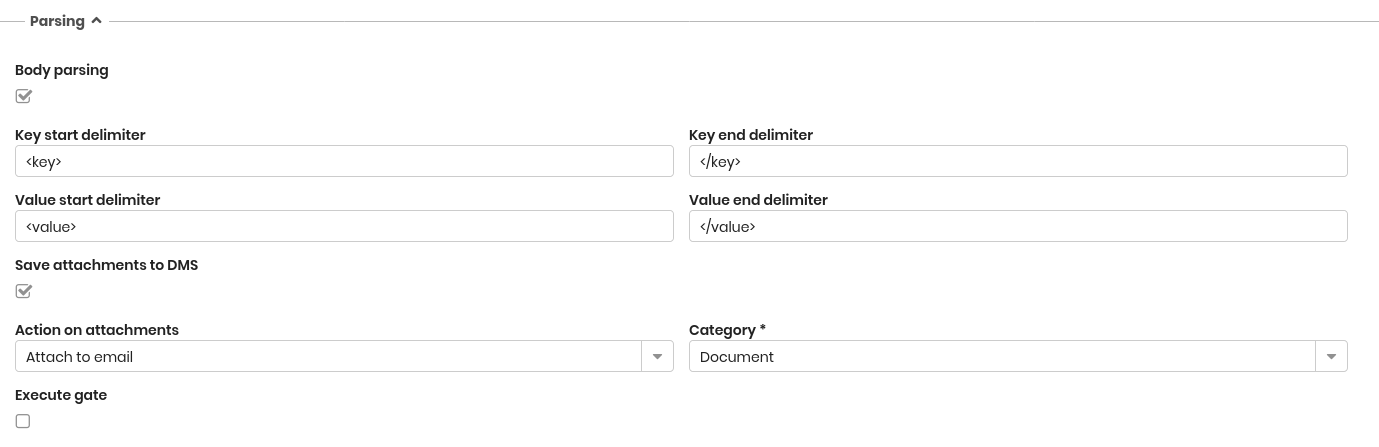
Note
The Body parsing feature allows workflow attributes to be populated using values extracted from the email body.
[key]Requester[/key]<value>John Smith</value>
[key]Description[/key]<value>The printer will not turn on</value>
[key]Priority[/key]<value>Medium</value>
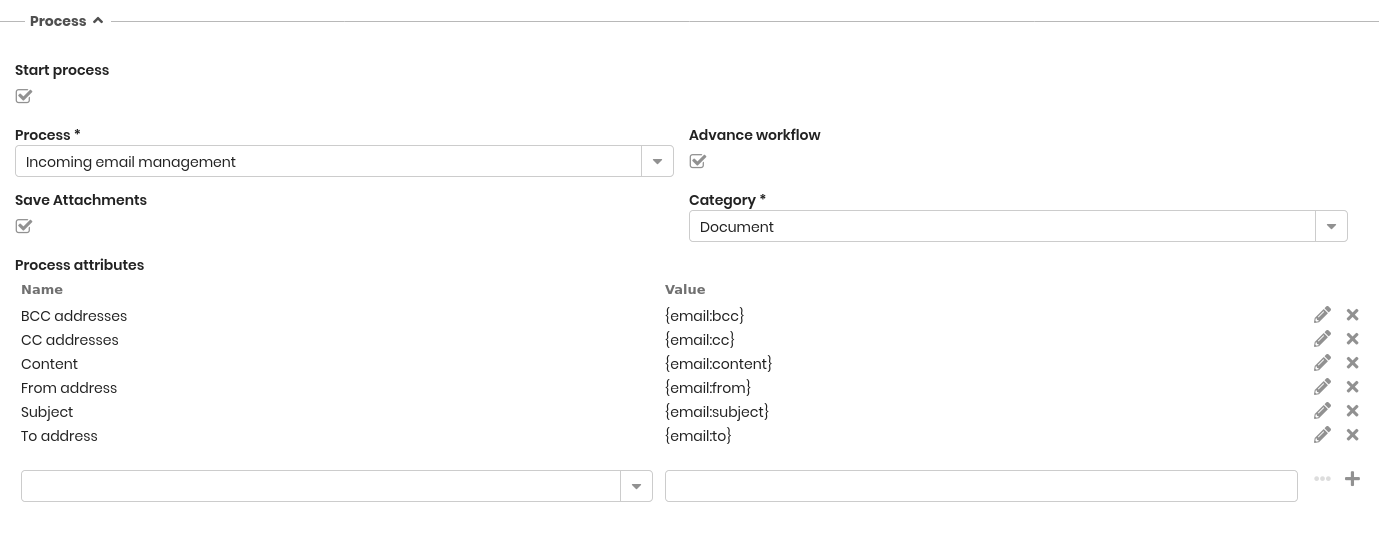
5 - Process
The following information is required:
- Start process — enables workflow start
- Process — workflow to start
- Advance workflow — automatically advances the process to the next step
- Save attachment — saves attachments to the DMS and links them to the process
- Category — document category associated with attachments
- Mapping of fields — mapping of email fields to process attributes
6 - Notifications
The following information is required:
- Send notification email — enables notification sending and, when enabled, displays the Email template field to select one of the preconfigured email templates
- Include attachments — enables the inclusion of attachments from the processed email and, when enabled, displays the Include attachments mode field to choose whether to attach only inline attachments or all attachments

Send email
This task schedules the automatic and recurring sending of emails, optionally including an attached report. Report parameters can be predefined so that the generated report depends on the task execution time.
1 - General properties
The following information is required:
- Name — task name
- Description — task description

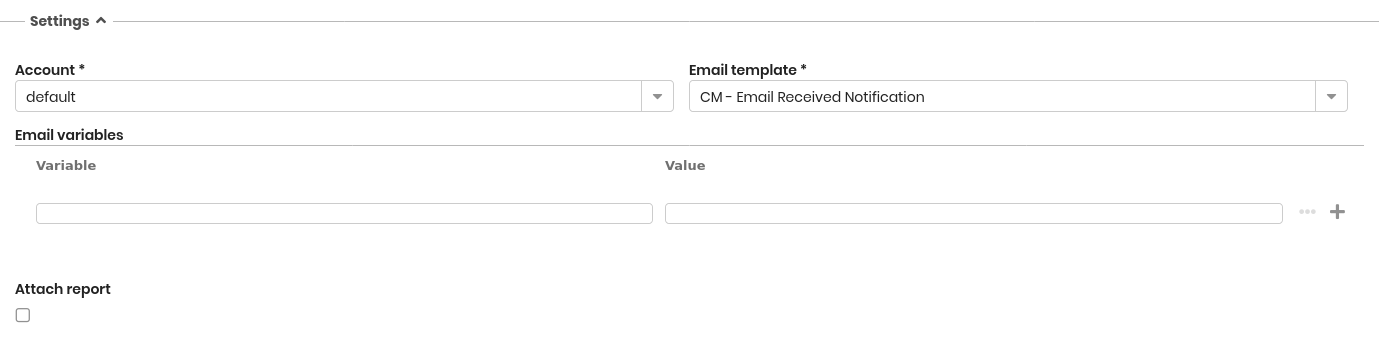
2 - Settings
The following information is required:
- Account — email recipient
- Email template — template used to compose the email
- Email variables — context variables used to calculate report parameters
- Attached report — enables report attachment and requires:
- Report — report to send
- Format — output format
- Report parameters — parameters required by the selected report
3 - Cron
The scheduling configuration is required:
- Simple mode — every hour, day, month, or year
- Advanced mode — Linux cron syntax

Import / Export file
This task performs batch import or export operations using file templates.
1 - General properties
The following information is required:
- Name — task name
- Description — task description
- Type — import or export
- Template — import or export template

2 - Settings
The following information is required:
- Source — defines where the file is retrieved from
- File on server — displays the following fields:
- Directory — server or shared folder containing the file
- File pattern — file name or matching pattern used for file detection
- Post import action — delete the file, disable it by renaming with a predefined pattern, move it to another folder, or perform no action
- URL — displays the URL field used to specify the source address
- File on server — displays the following fields:

3 - Cron
The scheduling configuration is required:
- Simple mode — every hour, day, month, or year
- Advanced mode — Linux cron syntax
4 - Notifications
The following information is required:
- Notification mode — defines when notifications are sent
- On errors
- Always
- Never
When On errors or Always is selected, the following information is required:
- Email template — select one of the preconfigured templates
- Account — select one of the preconfigured accounts
- Notification email template — select one of the preconfigured templates
- Attach import report — attaches the import report including executed actions and any errors to the notification email

Import database
This task performs batch import operations from relational databases using database templates.
1 - General properties
The following information is required:
- Name — task name
- Description — task description

2 - Settings
The following information is required:
- Database template — import database template to apply
- Address — connection string to the external database, defaulting to the value defined in the template
- Username — username used to access the external database, defaulting to the value defined in the template
- Password — password used to access the external database, defaulting to the value defined in the template

3 - Cron
The scheduling configuration is required:
- Simple mode — every hour, day, month, or year
- Advanced mode — Linux cron syntax
4 - Notifications
The following information is required:
- Notification mode — defines when notifications are sent
- On errors
- Always
- Never
When On errors or Always is selected, the following information is required:
- Email template — select one of the preconfigured templates
- Account — select one of the preconfigured accounts
- Notification email template — select one of the preconfigured templates
- Attach import report — attaches the import report including executed actions and any errors to the notification email

Import GIS
This task performs batch import operations from GIS planimetries using GIS templates.
1 - General properties
The following information is required:
- Name — task name
- Description — task description

2 - Settings
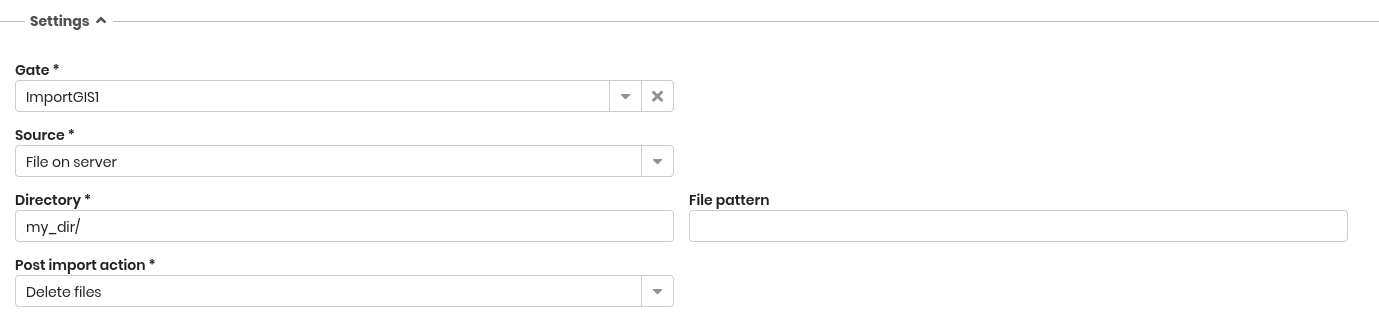
The following information is required:
- Gate — GIS import template
- Source — defines where the file is retrieved from
- File on server — displays the following fields:
- Directory — server or shared folder containing the file
- File pattern — file name or matching pattern used for file detection
- Post import action — delete the file, disable it by renaming with a predefined pattern, move it to another folder, or perform no action
- URL — displays the URL field used to specify the source address
- File on server — displays the following fields:
3 - Cron
The scheduling configuration is required:
- Simple mode — every hour, day, month, or year
- Advanced mode — Linux cron syntax
4 - Notifications
The following information is required:
- Notification mode — defines when notifications are sent
- On errors
- Always
- Never
When On errors or Always is selected, the following information is required:
- Email template — select one of the preconfigured templates
- Account — select one of the preconfigured accounts
- Notification email template — select one of the preconfigured templates
- Attach import report — attaches the import report including executed actions and any errors to the notification email
Import IFC
This task performs batch import operations from IFC exchange files, used to import 3D BIM models, using IFC templates.
1 - General properties
The following information is required:
- Name — task name
- Description — task description

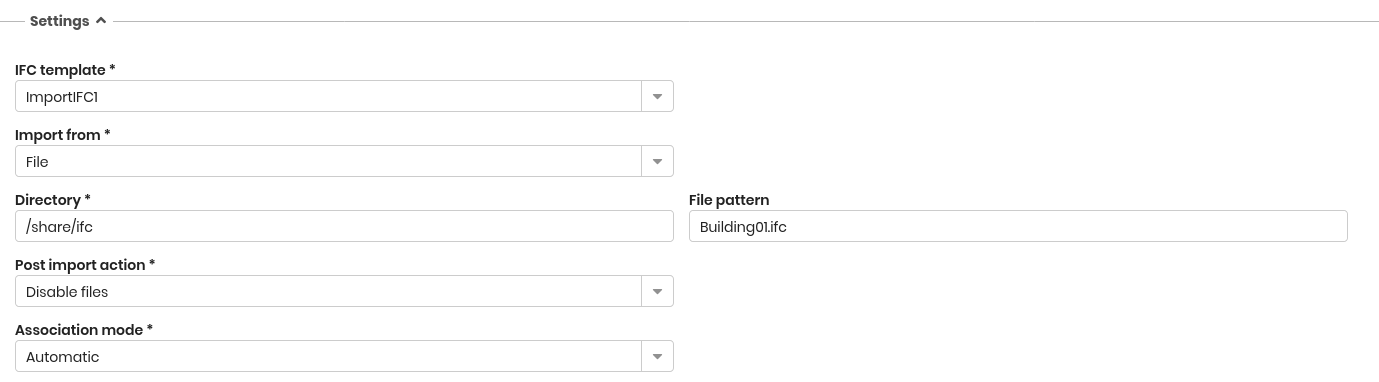
2 - Settings
The following information is required:
- IFC template — import template to apply
- Import from — defines the source of the IFC file
- File — displays the following fields:
- Directory — server or shared folder containing the file
- File pattern — file name or matching pattern used for file detection
- Post import action — action applied after import: delete the file, disable it by renaming with a predefined pattern, move it to another folder, or perform no action
- Project — displays the following field:
- Project name — BIM project used as the source
- File — displays the following fields:
- Association mode — defines how imported elements are associated, either automatic or static
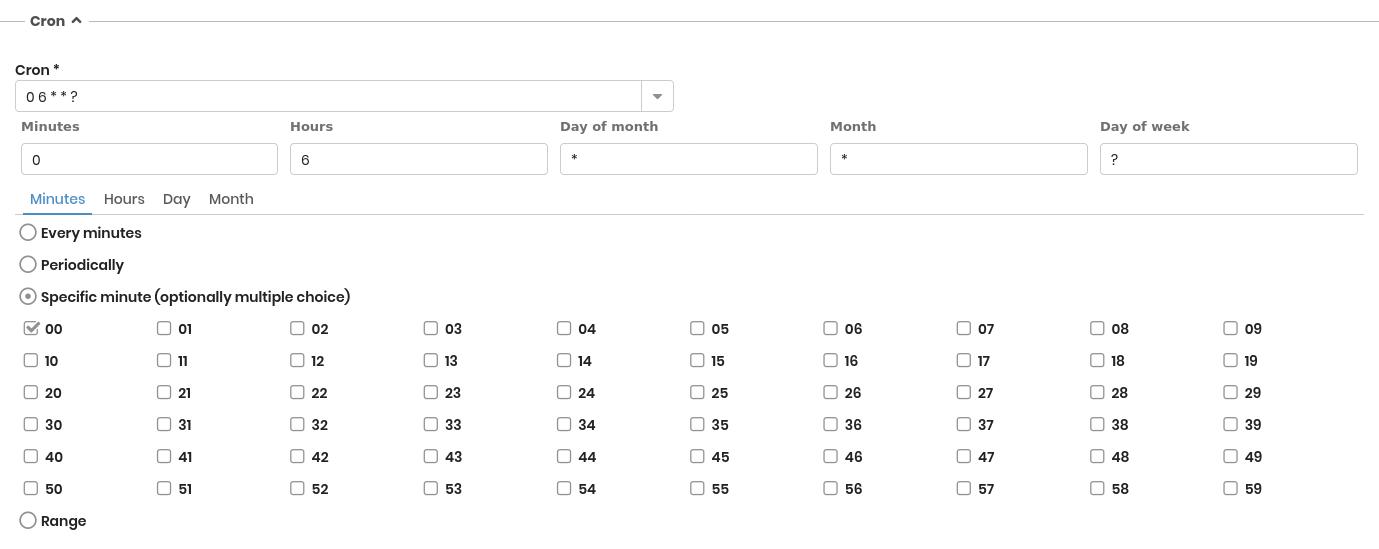
3 - Cron
The scheduling configuration is required:
- Simple mode — every hour, day, month, or year
- Advanced mode — Linux cron syntax
4 - Notifications
The following information is required:
- Notification mode — defines when notifications are sent
- On errors
- Always
- Never
When On errors or Always is selected, the following information is required:
- Email template — select one of the preconfigured templates
- Account — select one of the preconfigured accounts
- Notification email template — select one of the preconfigured templates
- Attach import report — attaches the import report including executed actions and any errors to the notification email

Start workflow
This task schedules the execution of a workflow configured in CMDBuild.
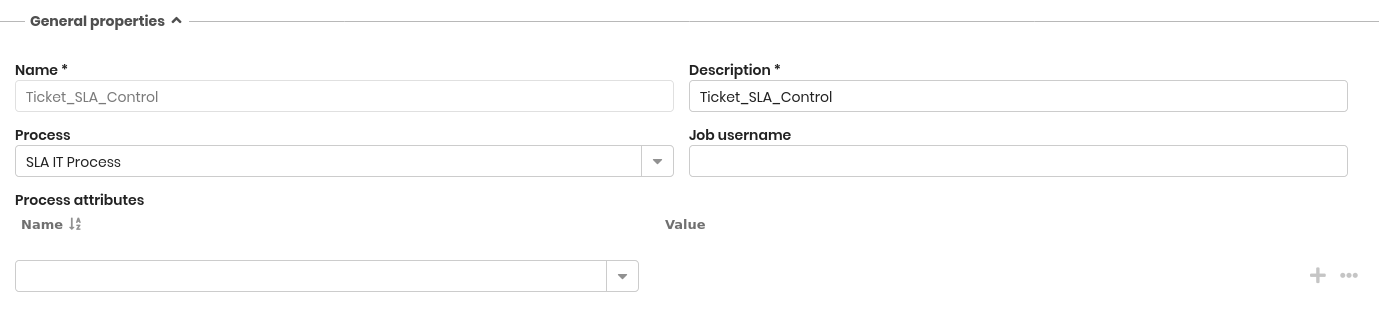
1 - General properties
The following information is required:
- Name — task name
- Description — task description
- Process — workflow to start
- Job username — Job username: to be used to start the workflow (from which permissions derive, according to the predefined group)
- Process attributes — attributes and initial values
2 - Cron
The scheduling configuration is required:
- Simple mode — every hour, day, month, or year
- Advanced mode — Linux cron syntax
Service bus
This task schedules the execution of a service bus configured in CMDBuild.
1 - General properties
The following information is required:
- Name — task name
- Description — task description

2 - Settings
The following information is required:
- Bus descriptor — service bus descriptor
- Gate — gate associated with the descriptor

3 - Cron
The scheduling configuration is required:
- Simple mode — every hour, day, month, or year
- Advanced mode — Linux cron syntax